Fixing flats on a bike can very time intensive and beyond frustrating to deal with. To prevent flats, we highly recommend adding Slime tire sealant to your bike tubes as $10 and 15 minutes in your garage and save hours repairing and patching flats. There are several different types of sealant, but the Slime brand has always worked great for us and is widely available.
If you are new to bikes, be aware that Slime Tire Sealant is designed to go inside of bicycle tubes with Schrader valves or Presta valves with removable cores. This “how to” is NOT for setting a wheel up tubeless which requires a different type of tire sealant and process.
Slime Tire Sealant

RATING: Exceptional
MSRP: $10
BEST FOR: Everyone! Spend $10 and 15 minutes in your garage and save hours repairing and patching flats.
PROS:
- Quickly and easily repairs and prevents flats and puncture
- Widely available
CONS:
- Can be messy
Slime Bike Tire Sealant: How it Works
Flat tires are a pain. Not only are they frustrating for kids and parents, they often sideline a bike for weeks. Fortunately, preventing flats is as simple as buying some Slime and 15 minutes in the garage. Tire sealants is essentially a fiber-filled “slime” that coats the inside of a bike tube to quickly and efficiently repair and prevents flats.
The green coating lines the inside of the tube, spreading the black fiber bits around the tube. When tube gets punctured the black fibers bits are pushed through the puncture hold by the air pressure in the tire and seals up the hole. In most cases, Slime only needs to be added to a tire once and prevents flats for essentially the life of the tire or tube.
In the 10+ years we have been using Slime in our kid’s bike tires, we have only experienced one flat after our son rode through a field of thorny weeds. Honestly, with all the bike riding that gets done around here, I can’t imagine life without tire sealant!
Know your Tube Valve Type
Before you purchase slime, double check to make sure your bike tubes have Schrader valves (shown on the left below), versus Presta valves, shown on the right. If you have Schrader valves, you are good to go as the Slime bottles come with the one specialty tool you need to install the Slime.

If you have Presta valves, you will need to make sure the core of the valves is removable. If it is not removable, you will not be able to add slime into the tubes and will need to buy new tubes with Slime already installed. Also be aware that you cannot just switch from Presta to Schrader valves on your bike as your bike’s is rim designed for either one or the other.
If your Presta valves do have a removable core, this video does a great job at walking you through adding Slime.
Where to Purchase Slime Tire Sealant
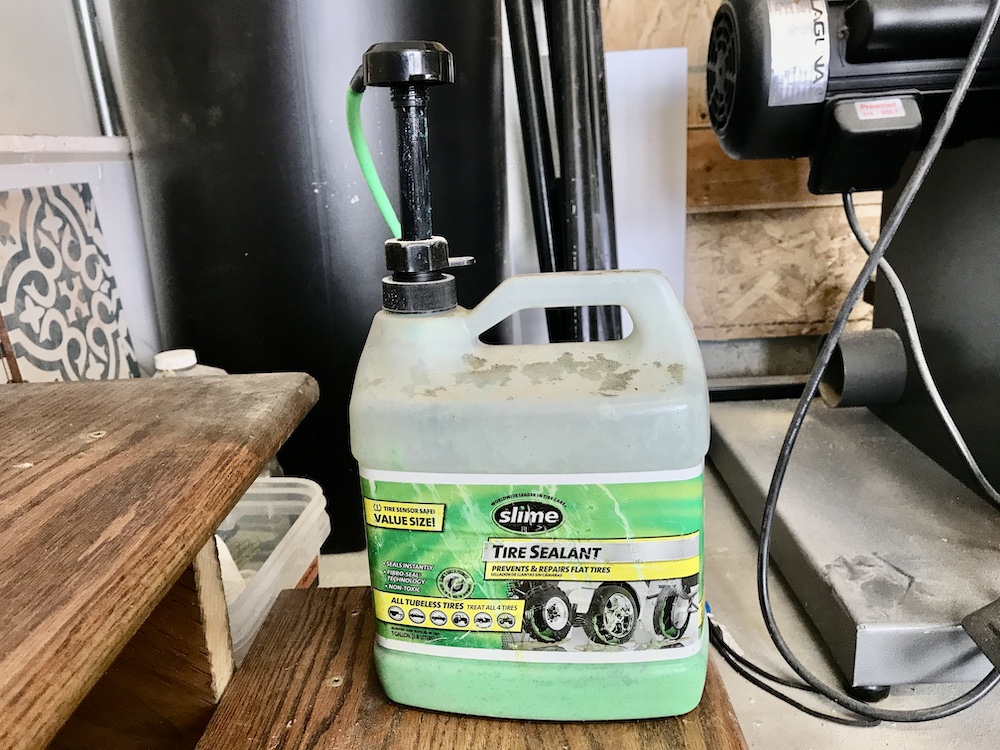
Slime sealant is widely available online as well as in most big box stores and hardware stores. If you need to fix a flat fast, it shouldn’t be hard to find locally. You only need about 2-4 oz. of slime per tire (the larger the tire, the more slime), so the 8 oz. bottle sold in the bicycle section is sufficient for two adult bikes. If you have a family of bikes to maintain, consider heading over to the automotive department where the Slime tends to be cheaper by the ounce.
We had our 1 gallon bottle of Slime for years and have used it to seal over 40 tires with plenty still left! The pump that comes with the bottle is also very handy.
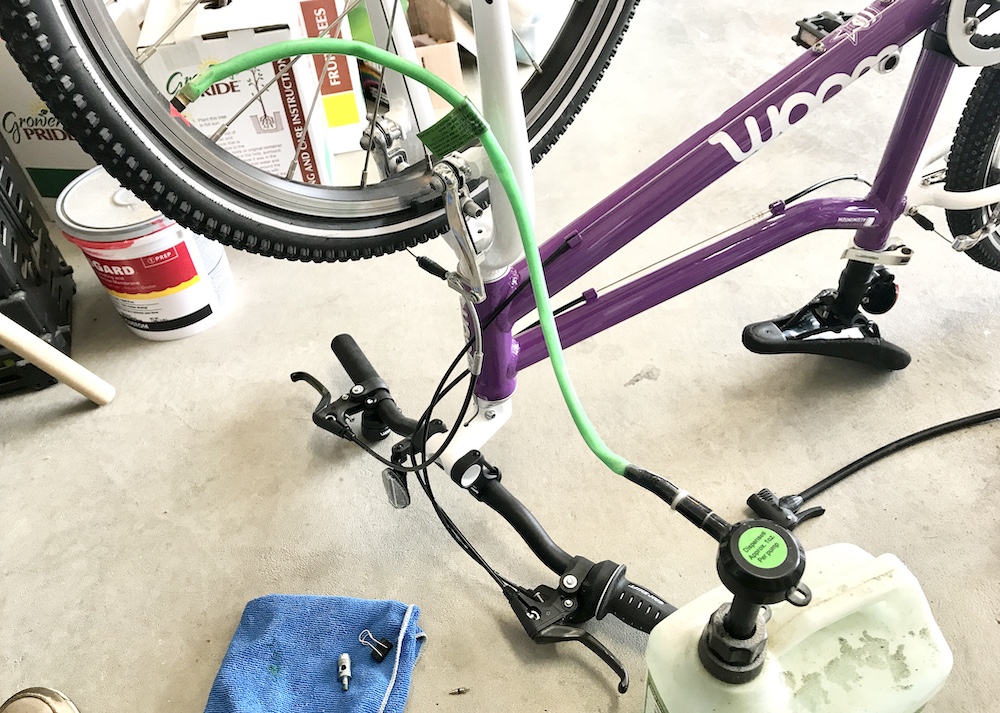
How to Apply Slime Tire Sealant
In order to add the Slime you will need to remove all the air out of the tube, so be sure to have a bike pump nearby before you start.
Step One: Remove the Valve Core
The valve core of the stem valve must be removed before you can add any Slime. While it sounds daunting, it is actually quite easy to remove using the included tool found beneath the black cap. Just remove the cap, insert the plastic teeth into the valve and then twist to unscrew the core.

Make sure you put the small core in a safe place so you don’t loose it.

Step Two: Apply Tire sealant
Once the valve is out, it’s time to add the Slime. Place the tube over the end of the valve, ensure it is a tight fit and then squeeze in the Slime. You will need to add about 2 oz. (1/4 cup) for the smallest 12″ tires and about 4 oz. for a larger adult bike. A chart on the black of the Slime container outlines how much you need.

Step Three: Re-Inserting the Valve and Re-inflating the Tire
Once the Slime is in place, use the tool to re-insert the core. Next, inflate the tire to the correct PSI (listed on tire sidewall) and then spin the wheel to allow the Slime to evenly distribute throughout the tire.

Step Four: Repeat and Ride
Repeat steps with the second tire and then you are ready to ride. Slime does not require any waiting period, allowing the bike to be used right away.
FTC Disclosure:Affiliate links are included in this review. No monetary compensation was provided for this review. The product reviewed was purchased by Two Wheeling Tots and not supplied by the manufacturer. All opinions and images are that of Two Wheeling Tots LLC. All content and images are copyrighted and should not be used or replicated in any way. View our Terms of Use.