Saris Cycle Glide Review
A cleverly designed ceiling bike rack, the Saris Cycle Glide frees up garage space while making your bikes easy to access. Read the review below to find out why we use this system in our own garage!
Saris Cycle Glide Overview

RATING: Exceptional
MSRP: $249
BEST FOR: Freeing up floor space in your garage. May not be the best option for bikes with hydraulic disc brakes.
CAPACITY: 4 bikes (6 with expansion kit), any size wheel (balance bike to adult)
PROS:
- Great for families – perfectly holds any size bike from balance bikes to adult bikes
- Saves wall and floor space – it’s easy to park cars in the garage!
- Clever sliding design makes individual access to bikes a breeze
- Sliding design allows for concurrent use with wall storage
- Can accommodate 4 to 6 bikes
- High-quality and durable
CONS:
- Installation takes several hours
- Height and upper body strength are necessary for easy use
- Can’t accommodate fat bikes
- Kids can’t access bikes without help
Saris Cycle Glide Review: Why It Earns our Highest Rating!
Impressive and clever are the first words that come to mind when describing the precision-designed Saris CycleGlide ceiling bike rack. With gliding arms and moving wheel hooks, the CycleGlide makes it possible to store kids bikes and adult bikes, but also makes it easy to get those bikes up and down from the ceiling. If you need to free up wall or floor space in your garage or basement, look no further!
How it Works
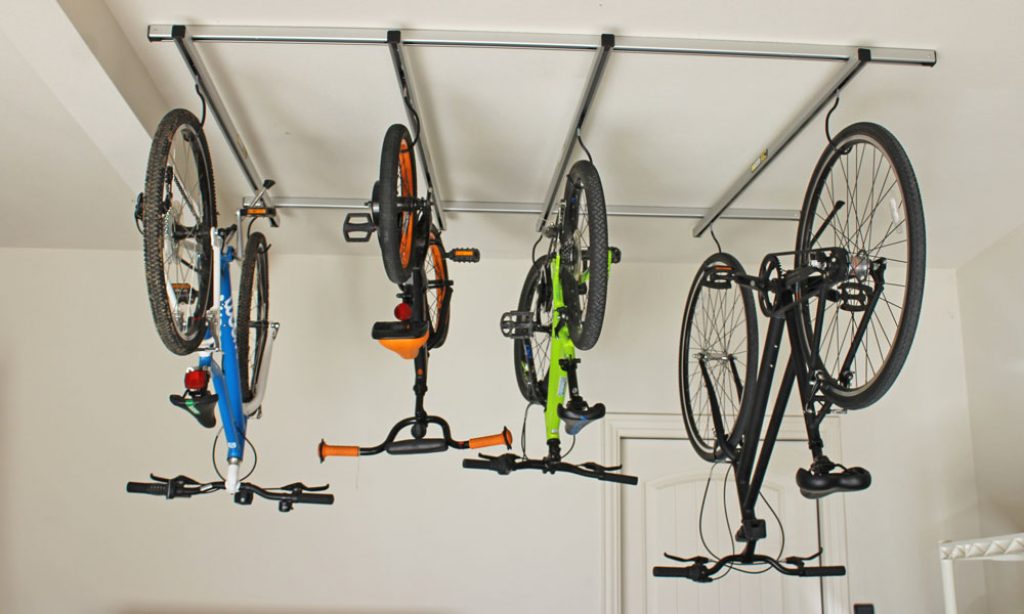
The Saris CycleGlide is kind of genius. And we don’t say that often. Saris has taken a notoriously difficult place to store bikes (the ceiling!) and made the process soooo much easier. The rack consists of two ceiling tracks that are mounted to the ceiling joists. This is the only part of the rack that remains stationary. The CycleGlide is a lot of moving parts – in the best way.
The four moving rails or “gliders” are attached to the tracks, and each glider houses two wheel hooks. The wheel hooks themselves “glide” within the gliders so that they can accommodate any length wheelbase, from balance bike to adult bike. And because they move independently of one another, you can switch up which size bike you store there at any time.
The gliders (moving rails) can move along the tracks so that when you need access to one bike, you simply move the other bikes out of the way for best access.
Check out this quick video to see the Saris CycleGlide in action!
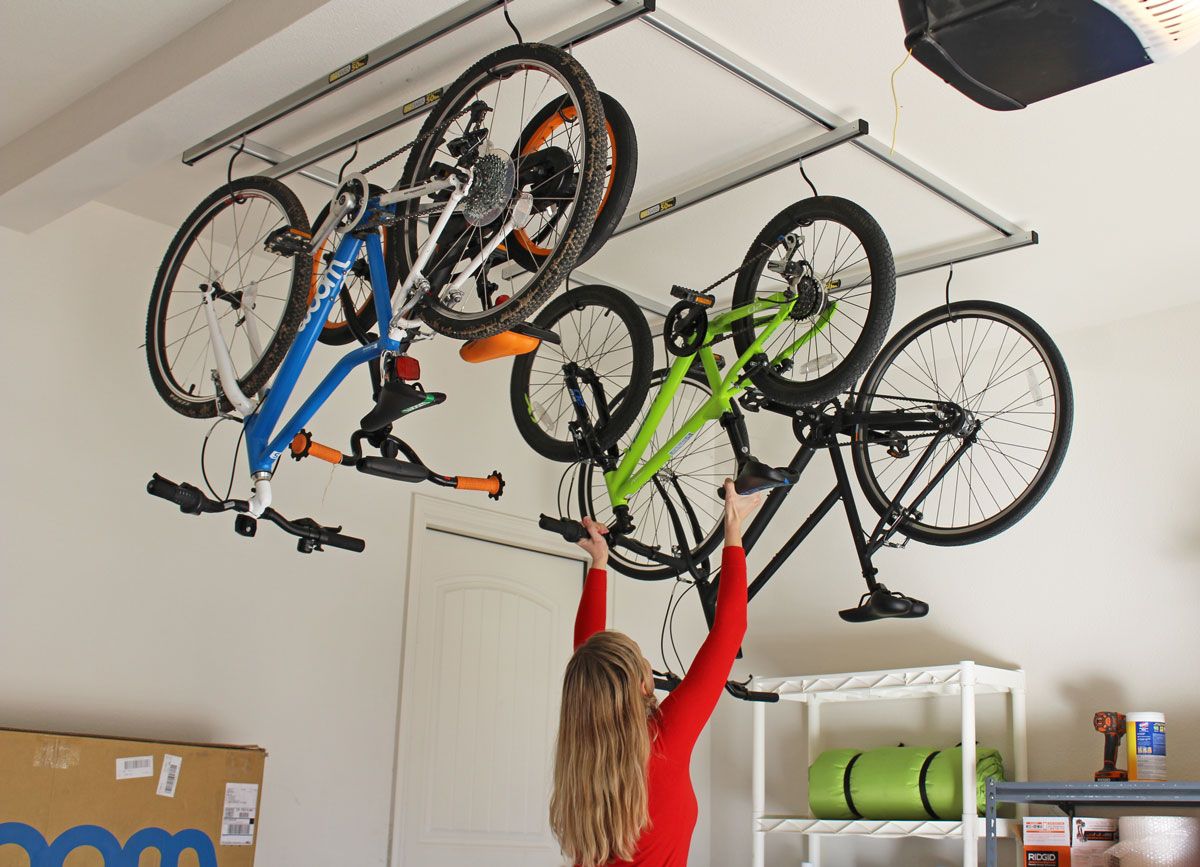
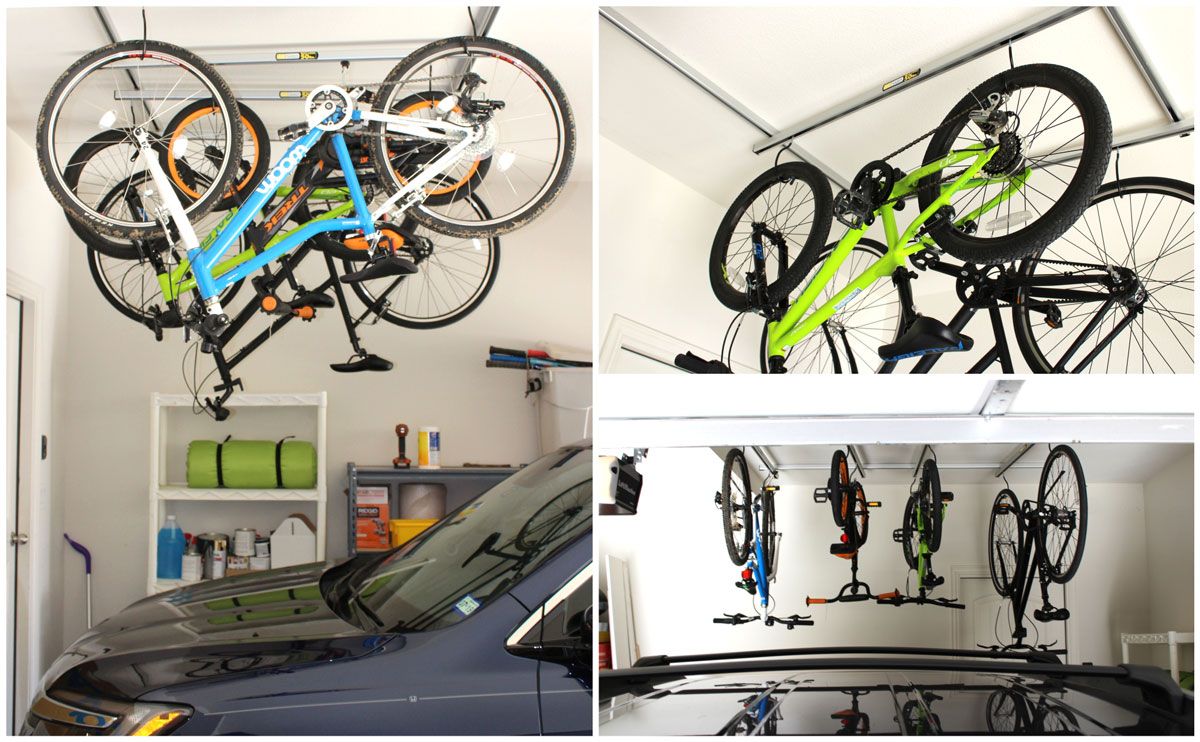
And one of the best parts is that the bikes truly are stored up and out of the way – you can park your car right underneath! For reference, the car in our photos is a Honda Pilot, and our garage ceiling 10′.
Capacity and Fit
Each glider has a maximum load of 50 pounds and can accommodate tires up to 2.5″ wide. While the CycleGlide comes standard with four gliders to store four bikes, you can purchase the CycleGlide 2-Bike Add-on Kit to store a total of 6 bikes.
With a wheelbase max of 56″, there’s really no limit to the size of bikes you can store, which is particularly great for families. On our CycleGlide, you can see that we’re storing three kids’ bikes (24″, 16″, 20″) and an adult bike. Those moving hooks make it incredibly simple to store any bike you’d like.

If you need to store more than 6 bikes, the Stashed Storage vertical ceiling bike rack can hang up to 12 bikes vertically.
Getting the Bikes Up and Down
The obvious potential problem with ceiling storage is that it may not be the best bike storage solution for shorter people. And it also does require at least a bit of upper body strength. I’m 5’10 and was able to manage just fine, even with a garage ceiling that is about a foot taller than average.
After a fair amount of grunting and struggling, I did figure a few things out through trial and error.
(1) It’s much easier if you move all the other bikes out of the way to access the bike you’re focusing on.
(2) When you’re putting a bike up, hang the rear wheel first because it won’t pivot, causing you to potentially miss the bike hook.
(3) Once you’ve hung the rear wheel on the first wheel hook, and while it’s hanging vertically, push the other wheel hook to the far end of the glider using the bike. Then, based on wheelbase length, you can easily slide the bike the appropriate distance away from the second wheel hook. This way, when you raise the second tire to the hook, everything is already lined up and you’re not struggling with the bike’s weight for too long.

Installation
Any time you install something on the ceiling, it’s always going to be a bit difficult. While the instructions say installation should take 1 to 2 hours, it took us about 3. We had trouble finding our ceiling joists, which has nothing to do with the CycleGlide and everything to do with how the house was constructed. We should have taken more time ahead of time to figure that out.

Besides finding the joists we could mount to, there wasn’t anything particularly difficult about installation, besides the fact it was on the ceiling. Our main recommendation would be to save time by really thinking through the rack’s placement before you want to start installation.
Half of our back garage wall has storage shelves. We had originally intended to place the rack in front of those, then realized we would be limiting our access to those shelves and aesthetically it would look really crowded. That said, because of the CycleGlide’s clever design, we actually could have installed it there and then just slid the bikes to the left or right to access the shelves when needed.
That’s one of the great things about the CycleGlide – even if you have a garage already packed full of storage, you can probably still use it, and have access to your other storage.
For us, we ended up placing the rack above the car instead. We were initially concerned about having a bike hanging above the walkway and right in front of the door into the house. But once again, Saris already thought through that. When we’re not accessing the bikes, we just slide all the gliders to the left side so our doorway is free and clear of bikes.
We also highly recommend reading the instruction manual thoroughly before you begin and watching this installation video:
Bottom Line
A cleverly designed and high-quality ceiling bike rack, the Saris CycleGlide frees up garage space while also making sure your bikes are easy to access. It’s not often that we’re truly impressed, but the CycleGlide sure does earn our exceptional rating.
FTC Disclosure: Affiliate links are included in this review. No monetary compensation was provided for this review, however, the reviewed product was supplied by the manufacturer or distributor to help facilitate this review. All opinions and images are that of Two Wheeling Tots LLC. All content and images are copyrighted and should not be used or replicated in any way. View our Terms of Use.